
Kill kit. This is a term that is commonly thrown around internet forums and social media. For those of you who have not heard the term, a kill kit is essentially a small bag (dry sack, stuff sack, zippered pouch, etc…) that houses all of the items you will need once an animal has hit the ground. The kill kit will keep your items organized, packed neatly, and provide go to access to whatever you may need during the field dressing process. In the following article, we will discuss what is generally found in the kill kit and what options are out there to customize your kit to meet your needs.
The bag
The basis of the entire kit is the bag or storage device. These can range from dry bags and stuff sacks to zippered pouches and, even, vacuum sealed bags. Generally speaking, I really like a small zippered pouch made of an extremely light material, such as silnylon. There are many companies making small organizing pouches that would work really well for this. This is the easiest step of building your kit and really requires nothing more than finding a good quality and lightweight bag that will hold your gear. A great bag to consider for its lightweight and waterproof properties in the Sea to Summit Ultra-Sil Dryview Sack.
Game bags
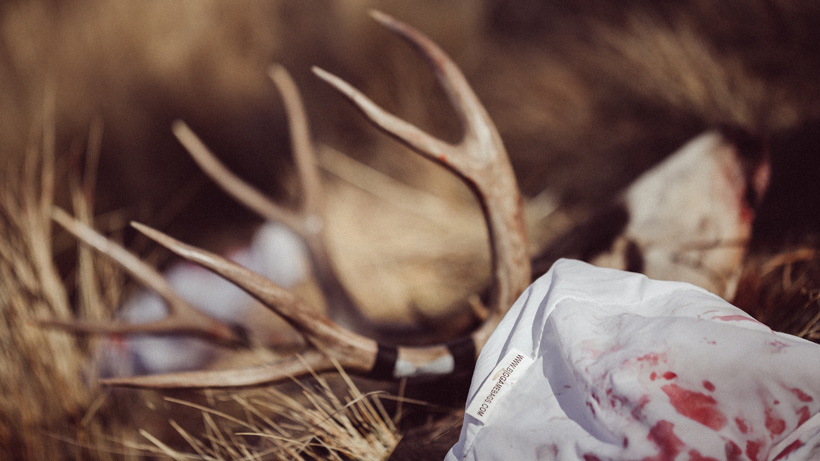
Here is where some research and decision-making will come into play. The game bag industry is very competitive and there are a ton of options out there. So, the question begs, what are the best game bags for me? First, I consider the type of hunt I am going on and what species I’ll be pursuing. Sometimes I’ll need bags for boned out meat; other times I’ll need bags specifically for bone-in quarters. This can also be dictated by the species of animal I will be pursuing.
Game bags will generally be found in three materials: canvas, cheesecloth and synthetic. Canvas game bags are exactly what you’d expect. These are generally the most durable and offer great protection from bugs, but they are extremely heavy and do not allow the meat to breathe very well. Cheesecloth type bags come in all shapes and sizes and will generally provide decent coverage. These are usually the lightest of the three options, but do tear easily, which can lead to bug issues rather quickly. Additionally, cheesecloth bags are usually not reusable due to the fact that bacteria will grow once bloodied. In my opinion, synthetic bags are the way to go. These bags will generally be marginally heavier than cheesecloth bags, but they are far more indestructible, breath incredibly well, and provide excellent protection against unwanted bugs. Beyond that, synthetic bags are machine washable and reusable. My current set is on its seventh animal and, other than staining, is good as new.
After deciding on what bag material will best suit your needs, it’s important to then decide what sizes and how many you will need. Generally speaking, nearly all of my hunts will take place far away from my truck, requiring most animals to be boned out to be efficiently brought out of the woods. Because of this, I opt to save a little weight and go with a shorter game bag as I do not need the extra length to fit an entire elk leg; this is not an issue with deer either way. That being said, I do keep a set up of full-length game bags in my pickup should the case arise that an elk is taken close to a road and the quarters can be brought out bone-in. For my uses, the Caribou Gear Carnivore III pack is excellent. For those of you who are planning on bringing out your quarters with the bone still attached consider the Muley or Wapiti pack.
CARIBOU GEAR CARNIVORE III

For elk hunting, I will usually carry all five of the bags that come with the carnivore set. This will allow me to break the bull into four separate bags of boned meat and leave a remaining bag for additional scrap meat, organs or a cape. For deer, I like to pack three bags so I can put one half of the boned deer in each bag and have an additional bag for scrap meat, organs or a cape.
KNIVES
Another avenue that can require a lot of thought and planning will be in what knife or knives you will carry. Personally speaking, I am terrible at sharpening knives. Give me a great stone and an excellent blade and I will show you how to dull that thing up in less than a minute. Because of this and my general lack of patience, I opt to go with a knife that utilizes a replaceable blade. These knives are always razor sharp, ultra lightweight, and much less of a headache. However, if I could maintain an edge on a fixed blade steel knife there would be certain tasks, such as popping joints, that would be much easier.
HAVALON PIRANTA EDGE

For the past several seasons I have used Havalon Piranta Edge knives with great success. These are extremely sharp and the replacement blades are dirt cheap. Beyond that, they weigh virtually nothing and take up hardly any room in my kill kit. To save a marginal amount of weight, I ditched the nylon holster and slid my extra blades under the pocket clip to hold them securely. My favorite accessory for the Havalon style knives is the Blade Remover. This little tool can be the difference between a new sharp blade and a knuckle on the ground that was once attached to your hand.
TYTO 1.1

Another great replaceable blade knife that has hit the market recently is from Tyto knives. This knife uses the same 60A blades as the Havalon but comes in a fixed blade format undoubtedly adding some strength to the whole package. Additionally, the Tyto 1.1 comes in at an impressive 1.5 oz! Tyto also offers a fixed blade version of this knife in the Esee Izula.
Miscellaneous items
Beyond my knives and game bags, there are also a few small items that will always be found in my kill kit. Rubber gloves is a new item I have started packing. Beyond protecting myself from any cooties I may contract—I nick my fingers a lot while processing an animal—these also make cleanup a breeze. I have used the gutless method on game for years and generally have very little blood to deal with, but now I virtually have none! I also keep all of my licenses and permits in my bag.
Another staple that every pack should have—whether it’s in your kill kit or not—is 550 paracord. This can come in handy for tying animals off on a steep slope, for hanging meat or for attaching tags. Beyond that, it can be useful for emergency shelters, broken shoe laces and a million other uses. I always have fifty feet in my kill kit.
Before beginning to work on an animal, I always get my first aid kit out and available. Additionally, I have electrical tape wrapped around a lighter that is commonly found in my survival/first aid bag that will sometimes be used to attach tags.
What am I missing?
Because the items you use to break down an animal is a completely personal decision I also wanted to include commonly used items that I do not pack. Admittedly, I am a weight nazi when it comes to my pack and I usually carry the bare minimum to get the job done. This has changed slightly as I’ve gotten older (I like to be comfortable!), but I’ve definitely gotten better at certain activities and have found items that I simply do not need.
A ground cloth is something I get commonly asked about. Typically, these will be used to lay boned out meat on once removed from the bone. This provides you with a bigger working area and a place to keep the meat clean as it “skins” up before putting it into a game bag. Personally, I lay my meat out across available brush and downed trees or use additional game bags. I have used plastic sheeting as a ground cloth in the past, but have found that the meat tends to stick to the plastic and everything ends up wading into a ball before I’ve gotten the first shoulder done. I have heard of hunters using Tyvek with great results. This will be a far more durable option and this material can be used for a multitude of things while in the woods as an added bonus.
Flagging tape is another very common item that I do not carry. Perhaps I’m just stubborn, dumb, or lucky—or even a combination of three—but I’ve carried ribbon on so many blood trails and never once taken it out of my pack. This was just another item that regularly got tossed in the pack but never called up for duty. After several years of this, I decided to omit this from my bag.
Concluding thoughts
This article was to serve merely as a template to base your own kill kit off of. The items I carry have been refined and refined over the years and I feel like I have a setup that meets my needs perfectly. The kit is nothing special other than a bag that houses everything you need once a tag has been punched. Be creative, but smart, in your approach to building your system and decide what items need to be upgraded, cut or added.


Time's Almost Up!
There's still time to save 30% on your first year of OutdoorClass! Just enter the code MEMORIAL30 at checkout and get started learning from the best hunters, outdoor experts, chefs, and more.


